
![]()
Patch :- patch function will be used to create a new record or modify an existing record in a Data source . patch will also merges records outside of Data source.
Use the patch function to modify records in complex situations, such as when you do updates that require no user interactions or use forms that span multiple screens.
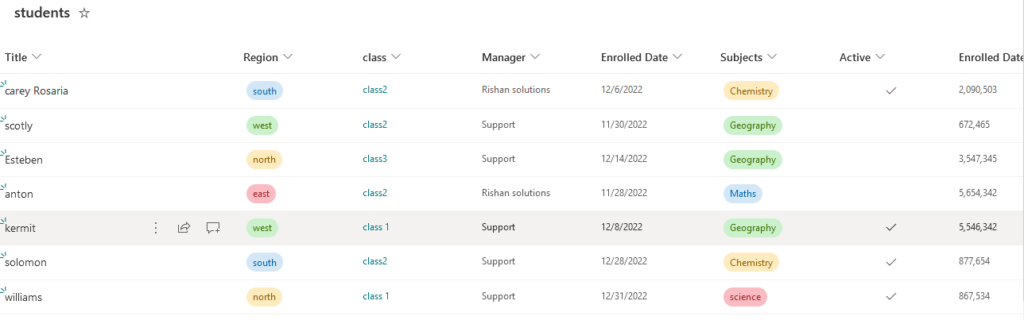
- The Data source is SharePoint List “Students” which includes the different type of columns.
2. Go To Power app studio and create a new Canvas App By naming it as “Patch with SharePoint”
Connect SharePoint as Data source
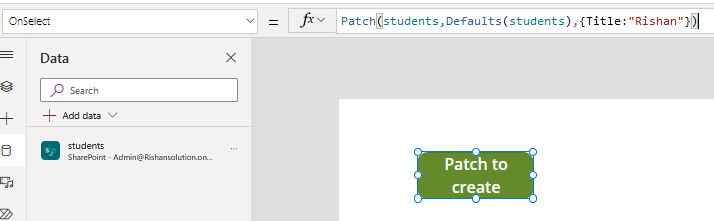
Insert a button and Name it “Patch to create
Title :- single line of text column ,To create a new item in the Title column write a function in the onselect property of the Button
Patch Syntax
Create record in data source
Patch(DataSource, Defaults(DataSource), {Record}
Write a function in the onselect property of the Button
| patch(students,Defaults(Students),{Title: “Rishan”}) |
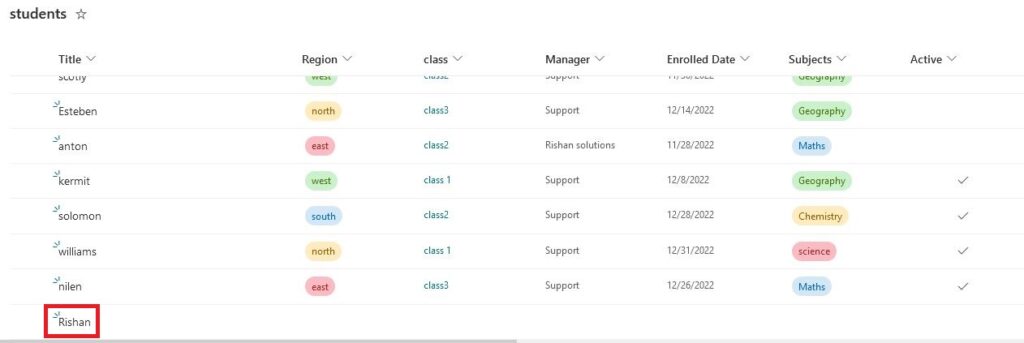
It will create a new item in the SharePoint Title column. We can also pass date Expressions (Today()) and Numeric values (567) to this column because it will take them as a string and Execute them.
When you run the app and click on the button the item will be created in the SharePoint as shown below
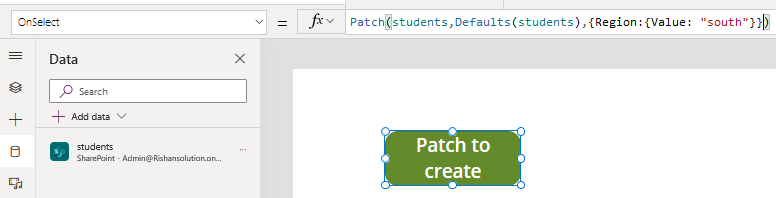
Region :- single select Choice Column, To create an item in the choice column the Value that we are passing has to be matched with choices in the that column, it will patch incorrect values too while patching.
Patch syntax for Choice column
{Value: "choice value"}Write a function in the onselect property of the Button
| patch( Students, Defaults(students), {Title : “south”, Region : {value:”south”}}) |
After running the App, click on the button , an item will be created in the Region column as shown below

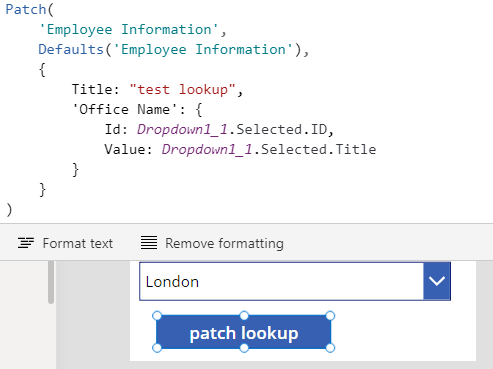
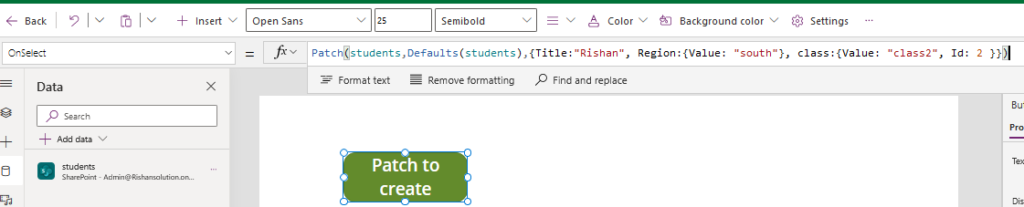
class :- Lookup column ,To create an item in the Lookup column the ID that we are passing has to be matched with the id in the Lookup list from which the data is coming .
Patch syntax for Lookup column
| { Value: “val 1”, // Value of lookup column Id: 2 // Id of lookup column } Multi Select Lookup column Table( { Value: “val 1”, // Value of lookup column Id: 1 // Id of lookup column }, { Value: “val 2”, // Value of lookup column Id: 2 // Id of lookup column } // keep adding multiple lookup values ) |
Write a function in the onselect property of the Button
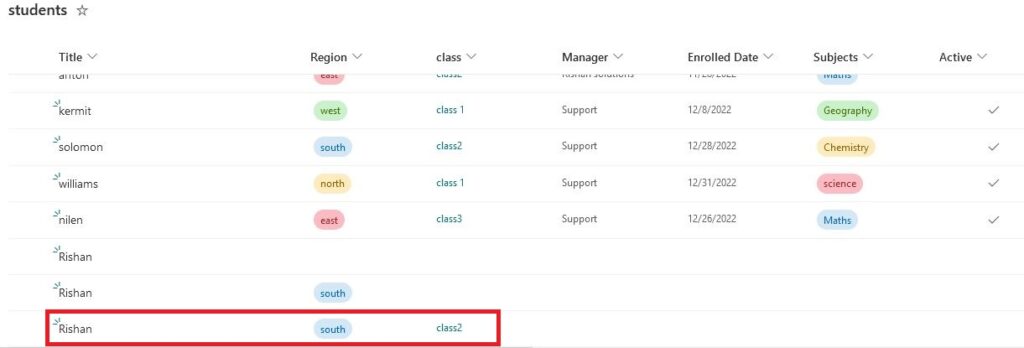
| patch( Students, Defaults(students), {Title : “south”, Region : {value:”south”}, class : {value :”class1″, id=1″}}) |
The data is coming from another list “class”
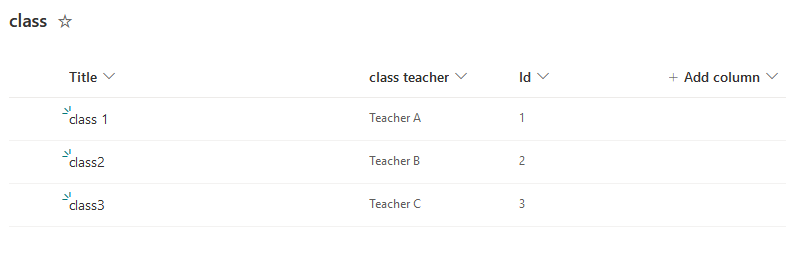
Run the app and check the SharePoint list “students” where the new item id created in the class column
The id must be correct though the class value wrong, then only it will create new item
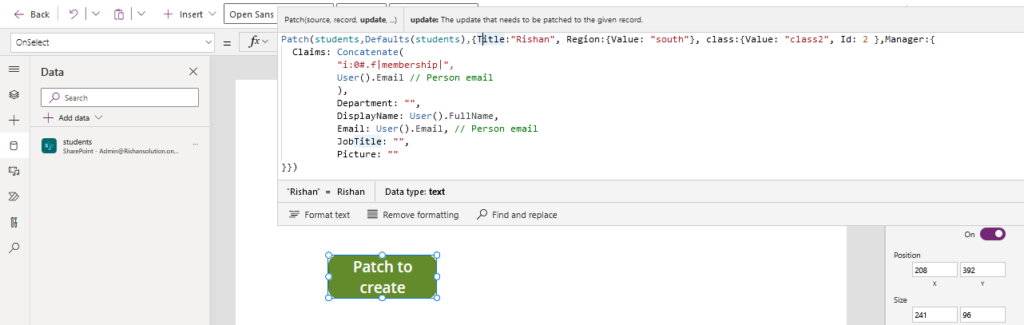
Manager :- person/Group column, Lookup column ,To create an item in the Person column we need to pass the six attributes in the syntax .
Patch syntax for Person column
| { Claims: Concatenate( “i:0#.f|membership|”, User().Email // Person email ), Department: “”, DisplayName: User().FullName, Email: User().Email, // Person email JobTitle: “”, Picture: “” } |
Write a function in the onselect property of the Button
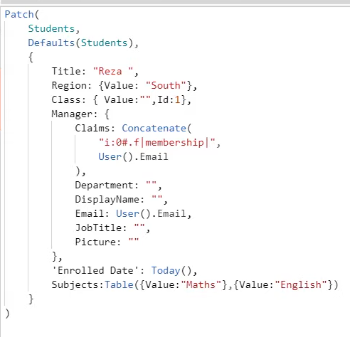
| Onselect = patch( Students, Defaults(students), {Title : “south”, Region : {value:”south”}, class : {value :”class1″, id=1″}{ Claims: Concatenate( “i:0#.f|membership|”, User().Email // Person email ), Department: “”, DisplayName: User().FullName, Email: User().Email, // Person email JobTitle: “”, Picture: “” }}) |
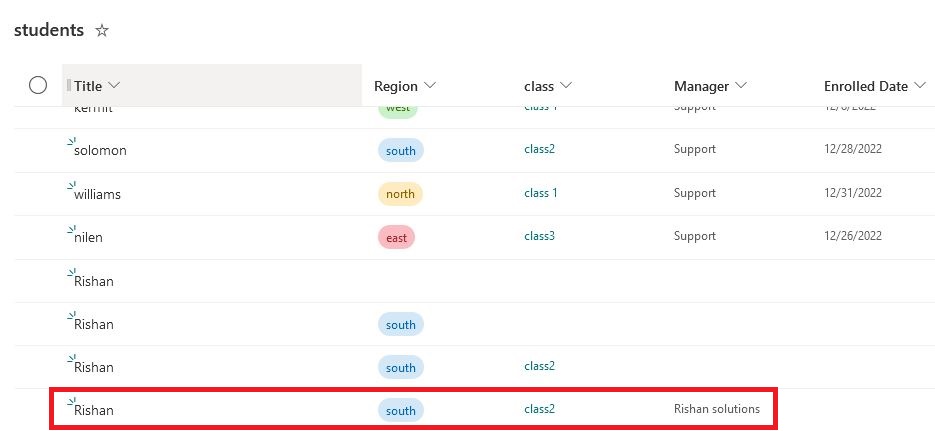
The result will be shown below where the new item is created in the Manager column
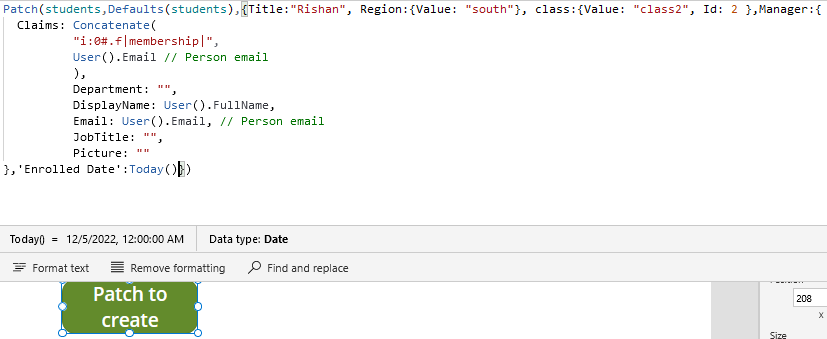
Enrolled Date :- Date and time column, when we are giving a space in the name of this column this name has to be put in single quotes while mentioning in the function otherwise it won’t accept it.
Write a function in the onselect property of the Button
| patch( Students, Defaults(students), {Title : “south”, Region : {value:”south”}, class : {value :”class1″, id=1″}{ Claims: Concatenate( “i:0#.f|membership|”, User().Email // Person email ), Department: “”, DisplayName: User().FullName, Email: User().Email, // Person email JobTitle: “”, Picture: “” }, ‘Enrolled Date’ :Today()}) |
we are patching today’s date in the list
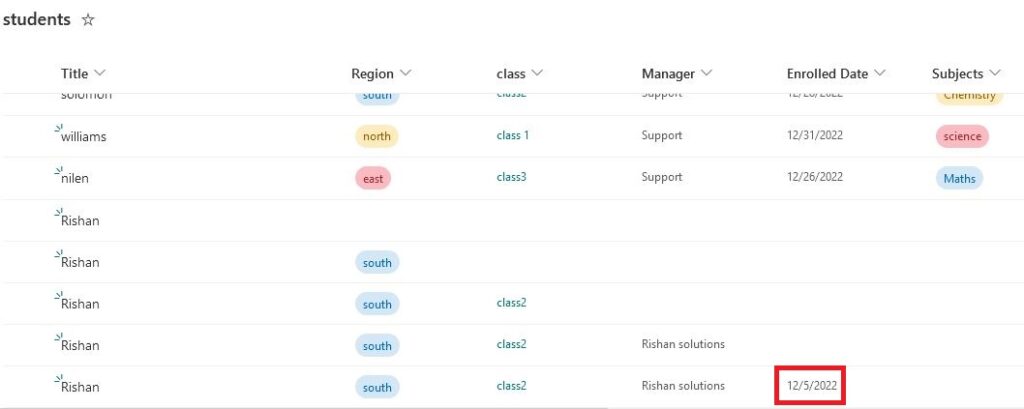
The Today’s date will display in the list as shown below
Subjects :- Multi select Choice column, It will receive the items in the tabular format
Patch syntax for Multi Select Choice column
| Table( {Value: “choice value 1”}, {Value: “choice value 2”} // keep adding multiple choices ) |
Write a function in the onselect property of the Button
| patch( Students, Defaults(students), {Title : “south”, Region : {value:”south”}, class : {value :”class1″, id=1″}{ Claims: Concatenate( “i:0#.f|membership|”, User().Email // Person email ), Department: “”, DisplayName: User().FullName, Email: User().Email, // Person email JobTitle: “”, Picture: “” }, ‘Enrolled Date’ :Today(), subjects: Table({value : “Maths”},{value :”English”}) |
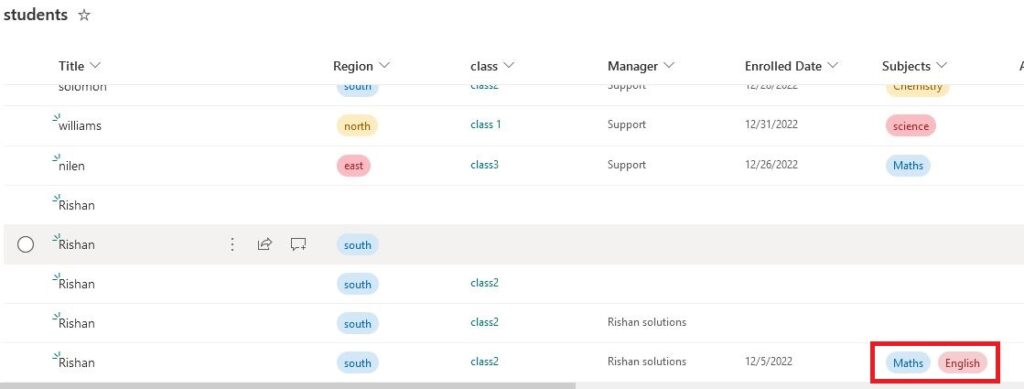
The new items are created in the subjects column as shown below
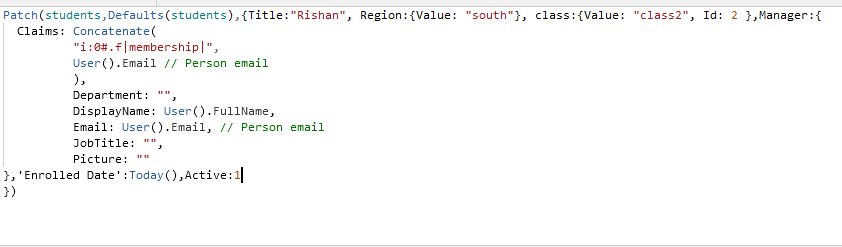
Active :- Yes/No type column, if you wants to patch ‘yes’ you have to pass the value 1 & if you wants to patch it as ‘No’ you have to pass ‘false’
Write a function in the onselect property of the Button
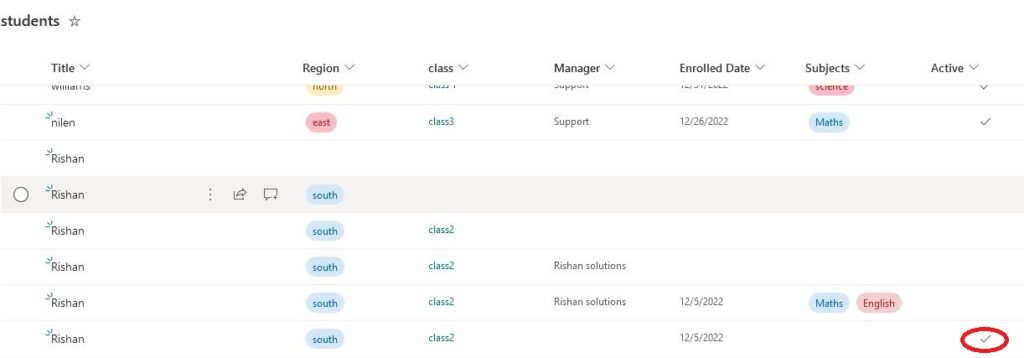
The yes/No column will be filled with “Right” mark
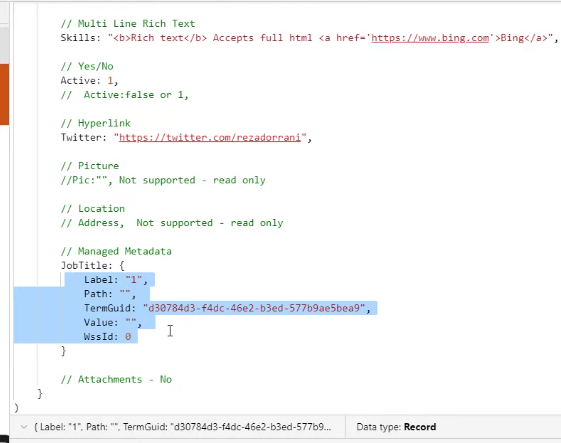
Job Title :- Managed Meta Data type column, The syntax for this column is different where it has to satisfy five attributes in the syntax
Syntax for Managed Meta Data
| { Label: “label”, Path: “”, TermGuid: “d30784d3-f4dc-46e2-b3ed-577b9ae5bea9”,// Replace with term guid Value: “”, WssId: 0 } |
Write a function in the onselect property of the Button
The result will be shown like this

Note :- The patch won’t works for the column types like picture, Address, Attachments. Here these type of columns only work for read only.
Patch By using Controls :-
We can use controls to patch items to the Share Point
- Insert 5 Text Labels To name the controls
- Add 2 drop down controls for Region (choice column) and class (Look up column)
- For Region drop down write a formula in the items property
| Choices(students.Region) |
4. For class drop down write a formula in the items property
| choices(students.class) |
5. Add a combo box to display the subjects column where the selections will be multiple. write a formula in the items property
| choices(students.subjects) |
6. Add a 2 Text input to display the items in the Title (single line on text column) column and Manager (person type column) column
7. Delete the default text in the 2 text inputs
8. Add a search icon to the Manager text input control and write a hint text in the left navigation properties as “search”
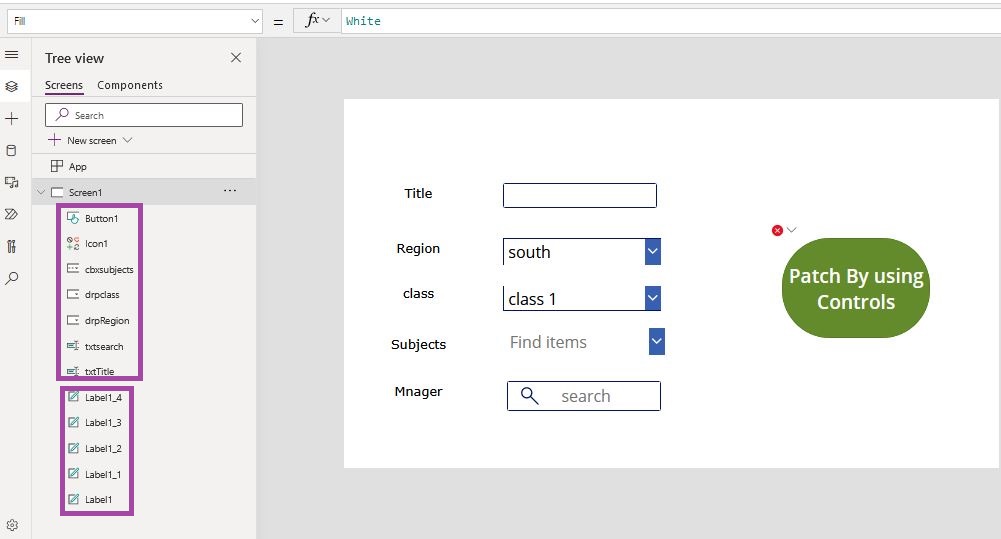
9. Rename the controls as shown in the image
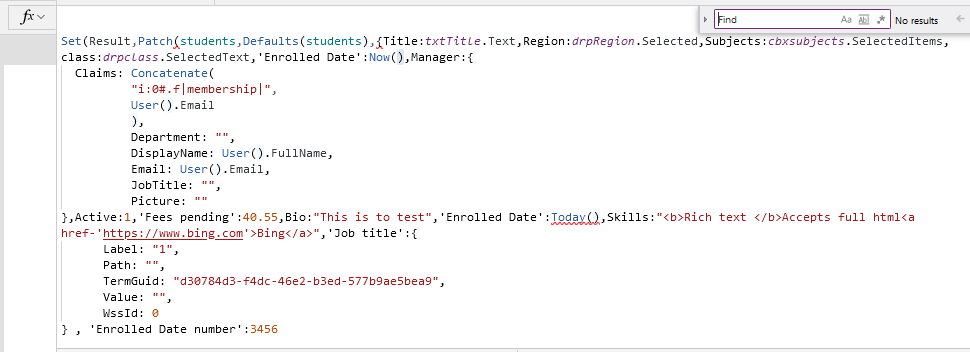
10. Add a Button control To the app and write a formula in the onselect property of the button
| Set(Result,Patch(students,Defaults(students), { Title:txtTitle.Text, Region:drpRegion.Selected, Subjects:cbxsubjects.SelectedItems, class:drpclass.SelectedText, ‘Enrolled Date’:Now(), Manager:{Claims: Concatenate(“i:0#.f|membership|”,User().Email), Department: “”, DisplayName:User().FullName, Email: User().Email, JobTitle: “”, Picture: “” }, Active:1, ‘Fees pending’:40.55, Bio:”This is to test”, ‘Enrolled Date’:Today(), Skills:”Rich text Accepts full htmlBing“, ‘Job title’:{ Label: “1”, Path: “”, TermGuid: “d30784d3-f4dc-46e2-b3ed-577b9ae5bea9”, Value: “”, WssId: 0 } , ‘Enrolled Date number’:3456 })); |
Give the details in the control and tap the button as shown
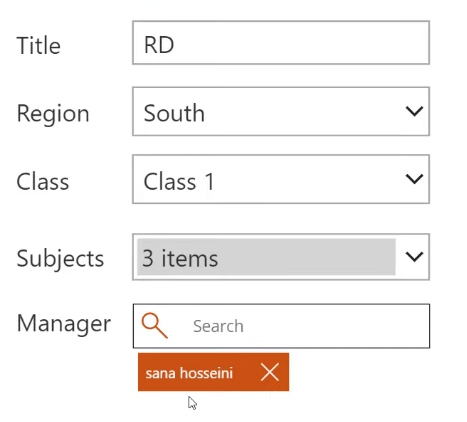
Now the items are patched to the SharePoint list
