

Requirement: when a user uploads an excel report to a document library, it will convert the excel report into PDF, store it in a specific SharePoint Document library, and remove that excel file from that library.
PDF from Excel using Power Automate Create
To create an automated cloud flow on the Power Automate, the following steps are:
- On the Power Automate, click on Create > Automated cloud flow.
- Provide a name to the flow and select the trigger ‘When a file is created (properties only)‘ under the SharePoint connector. Click on Create.

Create PDF from excel sheet using Power Automate
- Now the trigger is added to the flow environment. Provide the mandatory fields such as Site address and library name. Also, assign the folder path where need to upload the Excel files.
- Next,add another action that will retrieve the contents of a file by using its identifier. The contents can be copied and pasted elsewhere, or they can be used as an attachment.
- Click on the + New step > Get file content. Specify the SharePoint Site address and set the File identifier as Identifier (Select the value from the trigger’s dynamic content)

Power Automate Create PDF from Excel sheet
- Next, add a condition action to check whether the uploaded file is an excel or not. For that. click on the New step > Condition. Set the properties such as:
- File name with extension contains .xls
- Or
- File name with extension contains .xlsx
Where ‘File name with extension‘ is taken from the trigger’s dynamic content.

Create PDF from excel via Power Automate
- As per the condition, if the uploaded file contains the specified values (i.e., .xls or .xlsx), then the flow will proceed forward. Inside the If yes section, click on the + add an action > Create file (under the OneDrive connector). Set the action’s properties as below:
- Folder Path: Set the value as root (/) or specify a folder path.
- File Name: File name with extension (Select the dynamic content value from the trigger’s output)
- File Content: Select ‘File content‘ from the get file content‘s dynamic content.
- Again, add another action under the Create file action i.e., Convert file. Set the File as Id from the Create file’s dynamic content and Type as PDF.

How to create pdf from excel using power automate
- Once the PDF file is created in OneDrive, add another action to create this PDF file in a SharePoint library.
- Click on the Add an action > Create file (Under SharePoint connector). Provide the values to the mandatory properties such as site address, folder path, file name, and file content. Where file name and file content use the dynamic content values from the Convert file action.

Convert Excel to PDF format via Power Automate
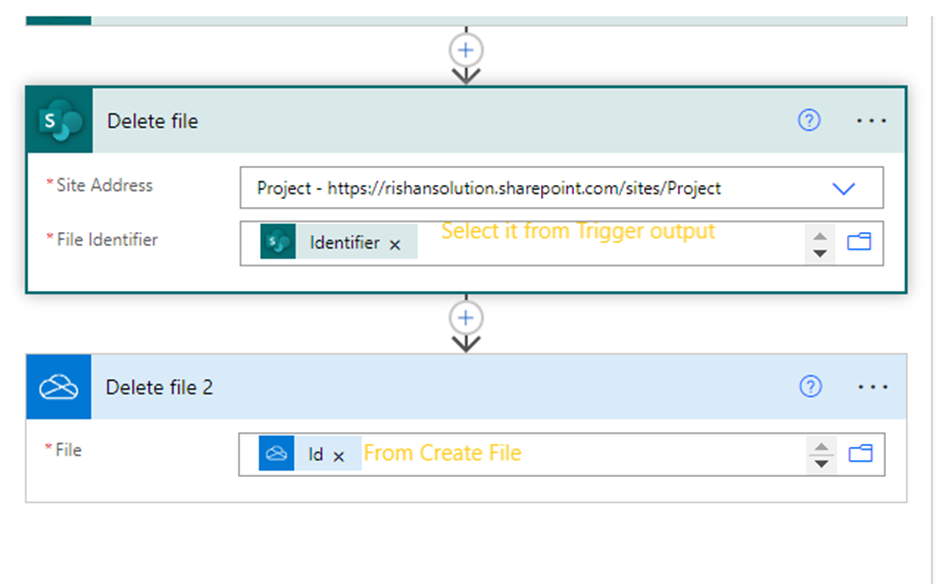
- Now, add another action to delete the excel file from the SharePoint folder where we uploaded it earlier.
- Click on Add new action > Delete file. (Under the SharePoint connector). Provide the SharePoint site address and set the file identifier as Identifier from the trigger’s dynamic content.
- Finally, add another action to delete the converted PDF from the secondary storage i.e., OneDrive. Click on the Add an action > Delete file (Under the OneDrive connector). Select Id from the Create file as File value.
How To Convert Excel Sheets To PDF Using Power Automate

Now save the flow and test it to see how it works. Click on Save > Test >Manually > run flow. For testing purposes, upload an excel file in the desired library folder and see it will convert that excel file into PDF. Also, it will remove the excel file from the library once it is converted to PDF.
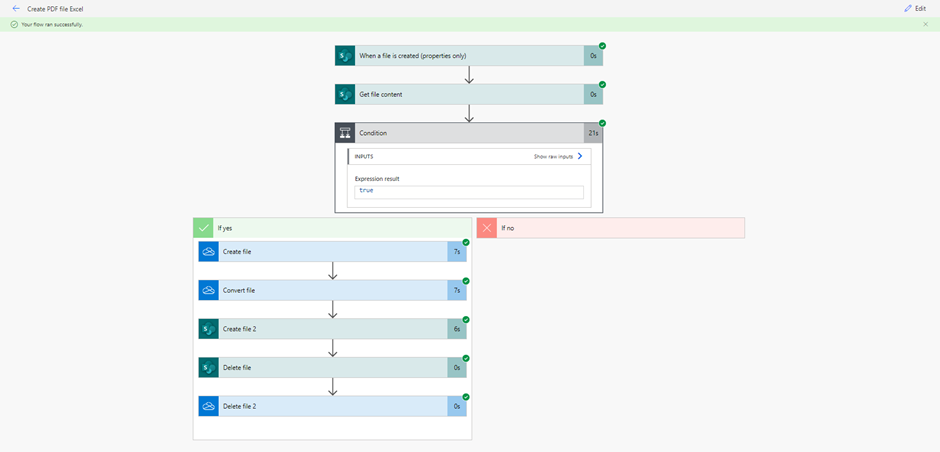

Convert Excel to PDF in Power Automate